Select and Import Images
This page explains how to select and import the images that MAAS requires in order to provision its nodes.
Note that the MAAS CLI can also be used for image management: see Select images and Import newly-selected images.
The Images page shows what images and architectures have been selected and downloaded. By default, MAAS will automatically grab the most recent Ubuntu LTS releases (and amd64 architecture). Below, two additional releases have been selected:
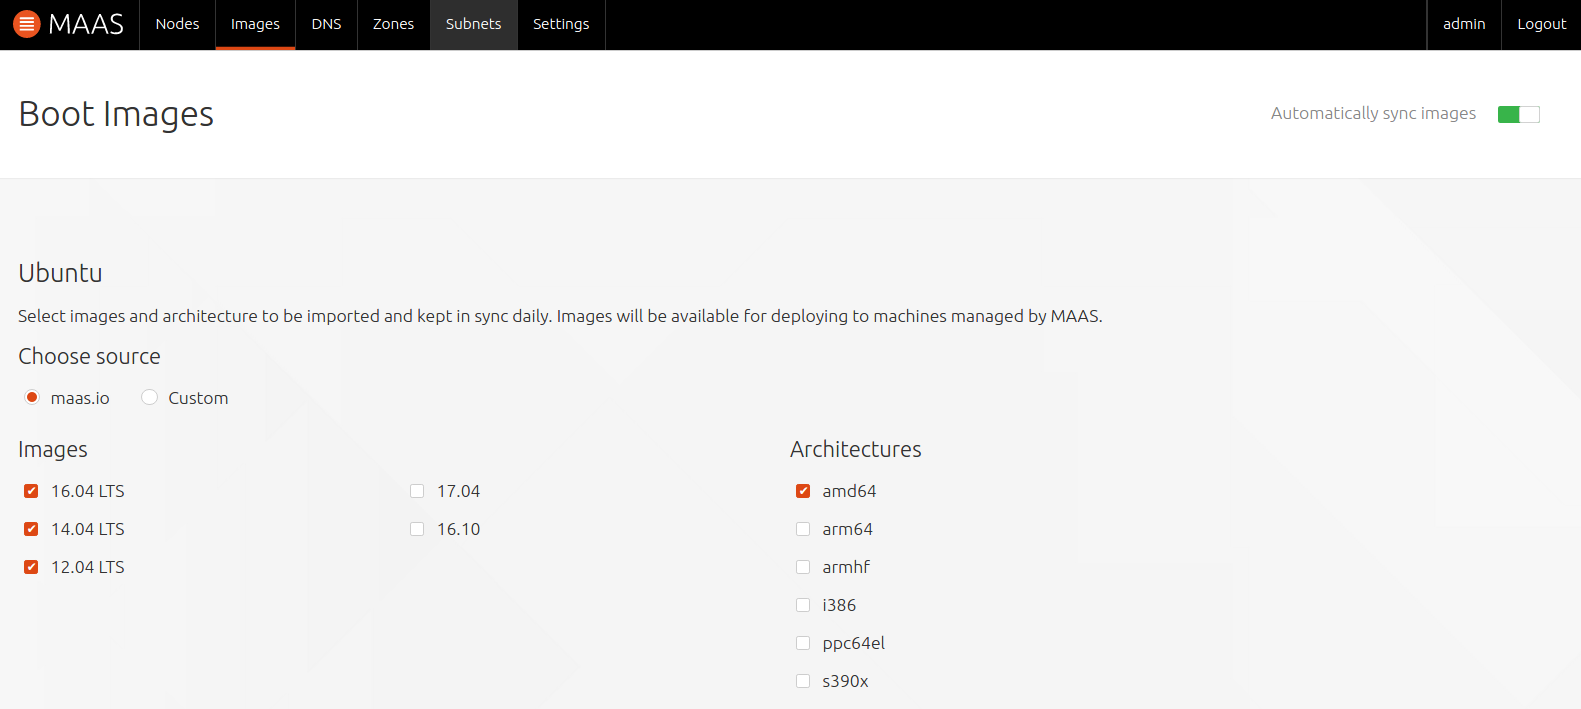
In the top-right corner there is a toggle switch for the automatic syncing of images. It is highly recommended to keep this enabled.
Note: Image sync occurs hourly and the availability of new images is influenced by the image stream MAAS is configured to use. See Boot image sources.
To change the selections select any other images (by choosing 'Release' and 'Architecture'), and click the 'Save selection' button to initiate the import. Existing images will be shown in addition to the newly selected ones. The latter will have their status updated as the import is processed:
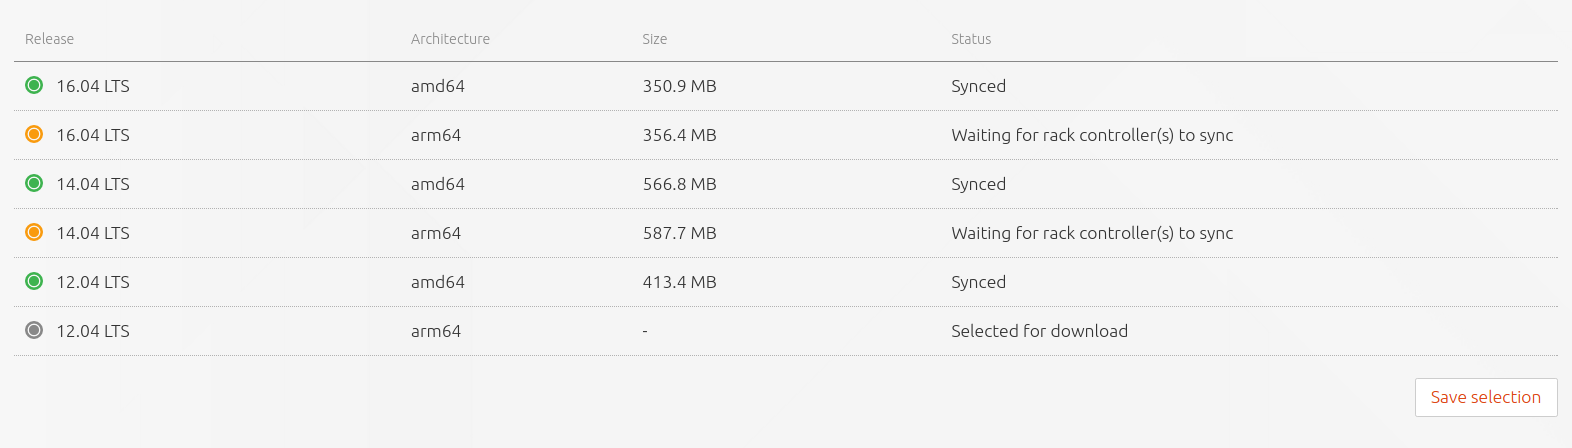
To remove an image, simply unselect it and click 'Save selection'.
Other images
It is also possible to import and provision images other than Ubuntu. Images supported and provided by MAAS will appear beneath the 'Other Images' section. Currently, images for both CentOS 6.6 and CentOS 7.0 are available and these can be imported and used just like the Ubuntu images above.

Using a local mirror
Optionally, a local mirror can be set up as the boot source. MAAS will then use it instead of the standard internet-based server. This will reduce the time required to complete the image import step significantly. See Local image mirror for instructions on doing this.