Add Nodes
Adding a node to MAAS is typically done via a combination of DHCP (and TFTP), which should, by now, be enabled in your MAAS environment, and PXE, which you tell the system in question to use when it boots. This unattended manner of adding a node is called enlistment.
Note: Configuring a computer to boot over PXE is done via its BIOS and is often referred to as "netboot" or "network boot".
Regardless of how a node is added, there are no special requirements for the underlying machine. In particular, there is no need to install an operating system on it.
Once MAAS is working to the point of adding nodes it is important to understand node statuses and node actions. See Node statuses and Node actions respectively.
Typically, the next step will be to commission the node. See Commission nodes.
Enlistment
As explained, to enlist, the underlying machine needs to be configured to netboot. Such a machine will undergo the following process:
- DHCP server is contacted
- kernel and initrd are received over TFTP
- machine boots
- initrd mounts a Squashfs image ephemerally over iSCSI
- cloud-init runs enlistment scripts
- machine shuts down
The enlistment scripts will send the region API server information about the machine, including the architecture, MAC address and other details which will be stored in the database. This information-gathering process is known as automatic discovery.
Since any system booting off the network can enlist, the enlistment and commission steps are separate. This allows an administrator to "accept" an enlisted machine into MAAS.
As an alternative to enlistment, an administrator can add a node manually (see below). Typically this is done when enlistment doesn't work for some reason.
KVM guest nodes
KVM-backed nodes are common and so a little extra guidance is provided here. The following actions will need to be performed on all rack controllers.
Begin by ensuring the virsh binary is available to the rack controller by
installing the libvirt-bin package:
sudo apt install libvirt-bin
Next, the 'maas' user will need an SSH keypair (with a null passphrase) so the rack controller can query and manage KVM guests remotely. A login shell will also be necessary when becoming user 'maas':
sudo chsh -s /bin/bash maas
sudo su - maas
ssh-keygen -f ~/.ssh/id_rsa -N ''
Add the public key to file /home/<USER>/.ssh/authorized_keys on the KVM host:
ssh-copy-id -i ~/.ssh/id_rsa <USER>@<KVM_HOST>
Where $KVM_HOST represents the IP address of the KVM host and $USER represents
a user on the KVM host with the permission to communicate with the libvirt
daemon. The latter is achieved via group membership, typically the libvirtd
group.
Note: You may need to (temporarily) configure sshd on the KVM host to honour password authentication for the ssh-copy-id command to succeed.
Still as user 'maas', test connecting to the KVM host with virsh:
virsh -c qemu+ssh://<USER>@<KVM_HOST>/system list --all
This should work seamlessly because the private key is passphraseless.
Note: Insufficient permissions for $USER may cause the virsh command to fail with an error such as failed to connect to the hypervisor. Check the user's group membership.
Exit from the 'maas' user's shell:
exit
See KVM/virsh power type example.
Add a node manually
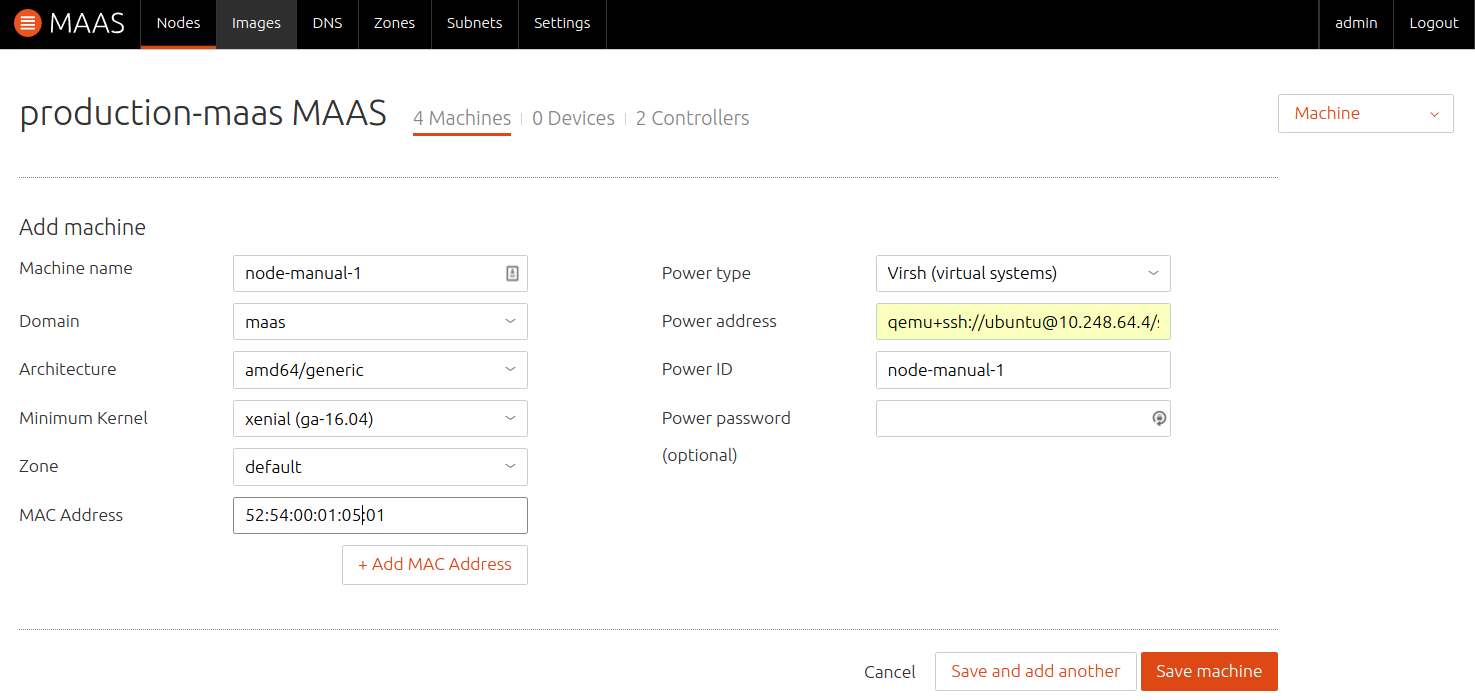
Enlistment can be done manually if the hardware specifications of the underlying machine are known. On the 'Nodes' page click the 'Add hardware' button and then select 'Machine'.
Fill in the form and hit 'Save machine'. In this example, a KVM-backed node is being added:

