Select and Import Images
This page explains how to use the web UI to select and import the images that MAAS requires in order to provision its nodes.
Note that the MAAS CLI can also be used for image management: see Select images and Import newly-selected images.
By default, the most recent Ubuntu LTS release (and amd64 architecture) are selected. To change the selections go to the Images tab, select any other images (by choosing 'Release' and 'Architecture'), and click the 'Import images' button.
After the import process has started, imported images will be listed beneath the selection area, alongside details on the image size, last update date and the number of nodes used by an image. A busy indicator will also appear until the import process has completed.
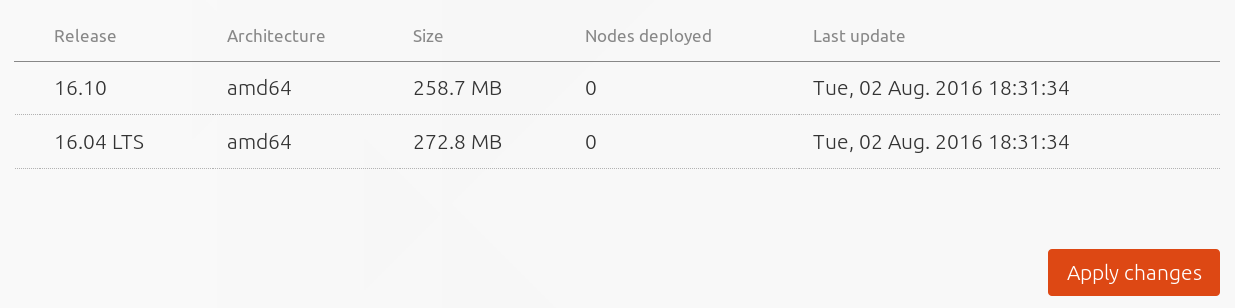
To remove an image, simply deselect it and click 'Apply Changes'.
Note: Image sync occurs hourly and the availability of new images is influenced by the image stream MAAS is configured to use. See Boot image sources.
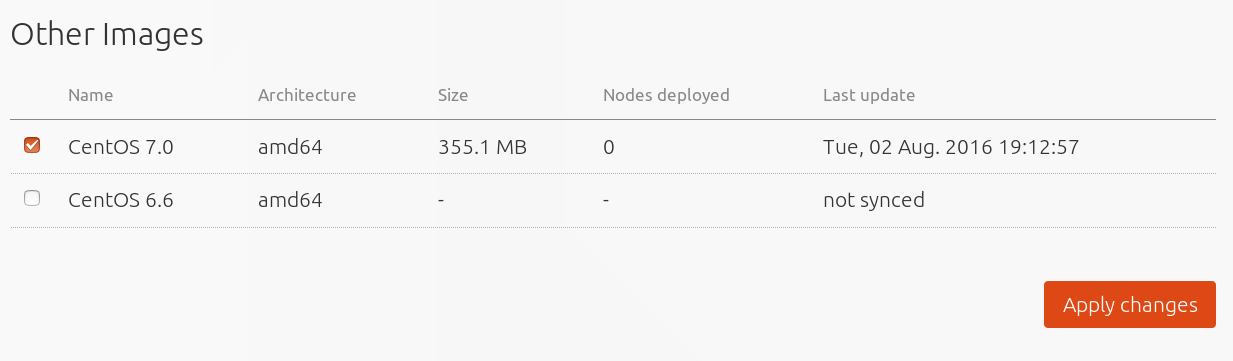
Other images
It is also possible to import and provision images other than Ubuntu. Images supported and provided by MAAS will appear beneath the 'Other Images' section of the web UI. Currently, images for both CentOS 6.6 and CentOS 7.0 are available and these can be imported and used just like the Ubuntu images above.
Using a local mirror
Optionally, a local mirror can be set up as the boot source. MAAS will then use it instead of the standard internet-based server. This will reduce the time required to complete the image import step significantly. See Local image mirror for instructions on doing this.