Install from ISO
The Ubuntu Server ISO offers to have the server-to-be-installed provide a complete MAAS environment or a single rack controller. This page is based on Ubuntu 16.04.1 LTS.
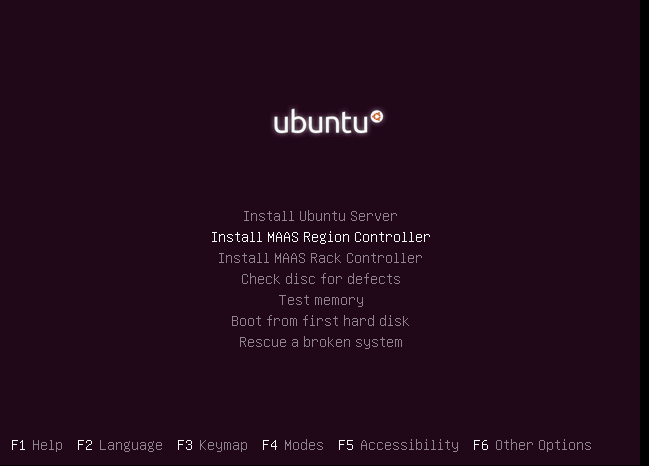
Choosing option Install MAAS Region Controller will actually install an entire MAAS environment. That is, it is equivalent to installing the 'maas' metapackage. The wording of this menu option will change in a future printing of the ISO.
Choosing option Install MAAS Rack Controller will install a rack controller and register it with an existing region controller. Therefore, an existing region controller is a requirement for this option to succeed.
Note: Using the ISO to install a rack controller is typically used to install an extra rack controller since the recommended starting design is to co-locate the rack controller with the region controller.
Each of these two options will add extra dialog boxes to the generic Ubuntu Server install procedure. This page covers these extra dialogs only. See the Ubuntu Server Guide for details on installing Ubuntu Server.
Region controller
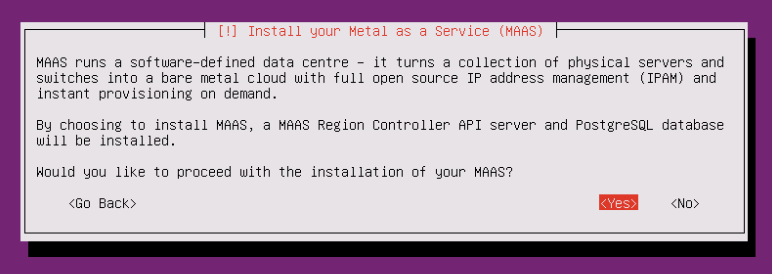
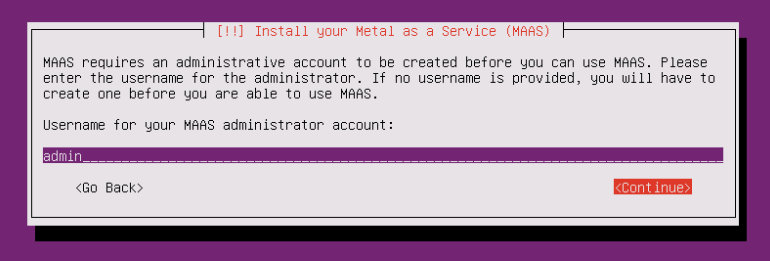
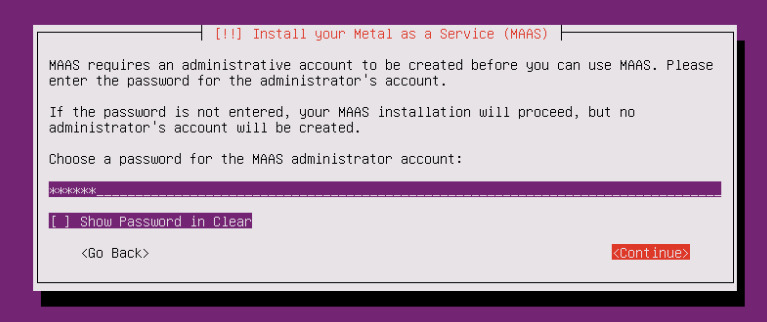
After having chosen to install a region controller, three consecutive dialog boxes will appear in order to do the following:
- Install a MAAS environment
- Set a username for the MAAS administrator
- Set a password for the MAAS administrator
Walkthrough of MAAS environment installation
Confirm the installation of a MAAS environment.
Provide the name of the initial MAAS administrator. It can be anything but in
this example 'admin' was chosen. This account is distinct from the system
account that will be created later as part of the generic Ubuntu Server
install.
Complete the creation of the MAAS administrator account by supplying a
password.
During one step of the generic Server install you will be asked whether a proxy is needed for the server itself. This is separate from the proxy that MAAS provides to its nodes (see Proxy).
Rack controller
After having chosen to install a rack controller, three consecutive dialog boxes will appear in order to do the following:
- Install a rack controller
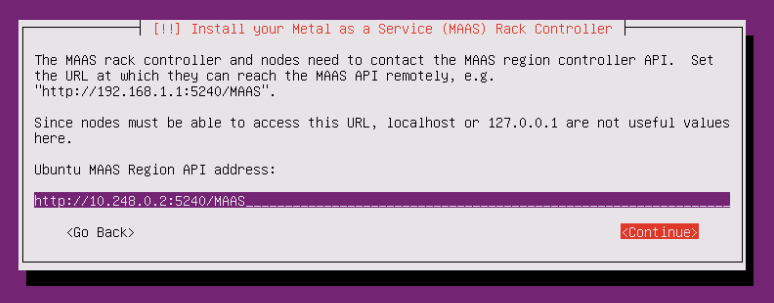
- Input the location (URL) of the region API server
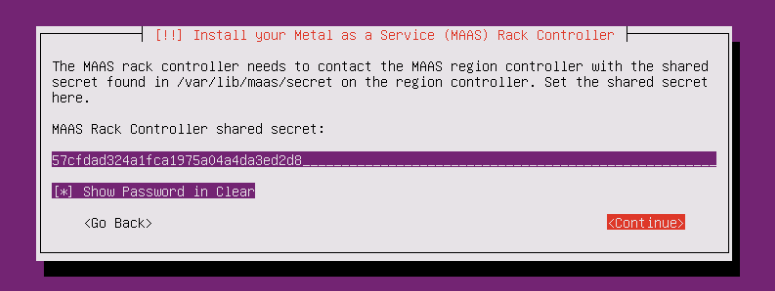
- Input the shared secret required for rack controller registration
For nodes on an IPv6 subnet, the URL must use a hostname instead of an IP address and it must resolve to both IPv4 and IPv6 addresses, both on the rack controller and on the nodes.
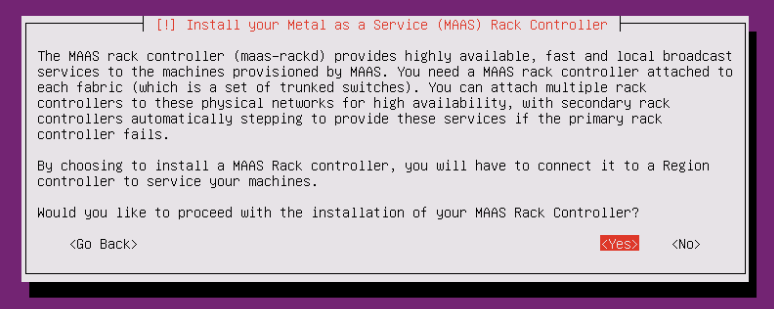
Walkthrough of rack controller installation
Confirm the installation of a rack controller.
Point the new rack controller at an existing region API server so it can
register with it.
Provide the secret required for registering the rack controller. It is found
on the region API server.
The final dialog will not confirm whether registration was successful. Once
Ubuntu Server is fully installed and rebooted you should inspect
/var/log/maas/rackd.log for any possible error messages. Alternatively, you
may verify that the rack controller shows up in the web UI. You can always
register the rack controller manually (after the server has rebooted) if a
mistake was made. See MAAS CLI - install a rack controller.
You can choose to display the typed secret (necessary for registering the rack controller) in cleartext. This can help prevent mis-typing and thus avoiding a failed registration.
An SSH server is not installed on the rack controller by default. Near the end of the generic Server install there will be the opportunity to install optional software. You may install an SSH server at this time.
Next steps
Once you have installed your MAAS environment (region + rack controller) and any possible extra rack controllers(s), see the Checklist for what to do next.