Explore MAAS
MAAS is designed to scale, but it can be explored effectively with virtual machines, rather than real hardware, enabling you to experiment with its functions and processes without committing real network and hardware resources.
The following overview covers a typical virtual machine installation, with a focus on the web-based user-interface. It's a non-exhaustive introduction, but does provide a typical working outline of how MAAS is used and what it's capable of. The same and more advanced configuration can be accomplished from both the CLI and the REST API.
The User Manual offers a more comprehensive guide to installation, configuration and usage.
Installation
For best results, we'd recommend testing MAAS with libvirt and its KVM/QEMU hypervisor driver. This combination is used by default in Ubuntu and the majority of Linux distributions; it's also easy to install and natively supported by MAAS for power management duties.
We'd also recommend installing the GUI virt-manager to ease configuration,
but libvirt can also be operated from the command line.
Note: MAAS will also work within a Linux virtual machine running from Oracle's VirtualBox, which may be useful if you want to test MAAS from a Microsoft Windows or macOS environment.
Assuming a base installation of Ubuntu 18.04 LTS(Bionic) server running on a fresh libvirt instance or real hardware, matching the minimum requirements, MAAS is installed with the following command:
sudo snap install --devmode --stable maas
While testing, both the region controller and the rack controller will run on this single machine, but you can have multiples of both to scale out MAAS to meet your requirements, from just a few machines to hundreds across different zones.
To initialise MAAS for a single machine, issue the following command:
sudo maas init --mode all
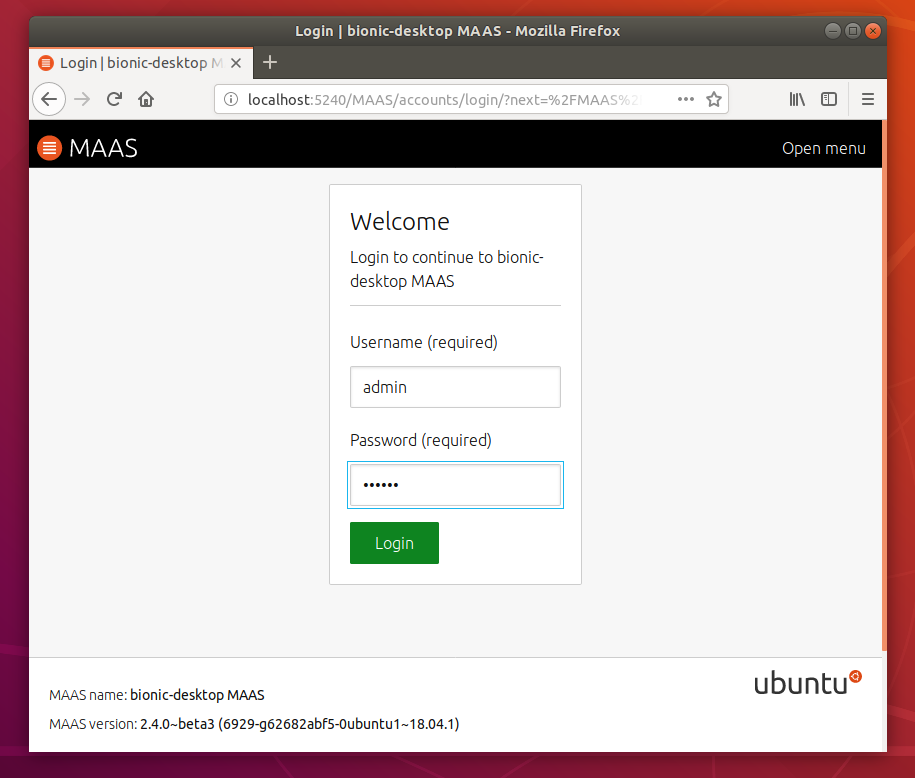
After entering a username and password, web UI is now accessible from the configured address from where you can now login with your new credentials.
See Installation for further details.
Welcome to MAAS
After a fresh MAAS installation, the web UI presents a Welcome dashboard to help set many system-wide options, including connectivity, image downloads, and authentication keys.
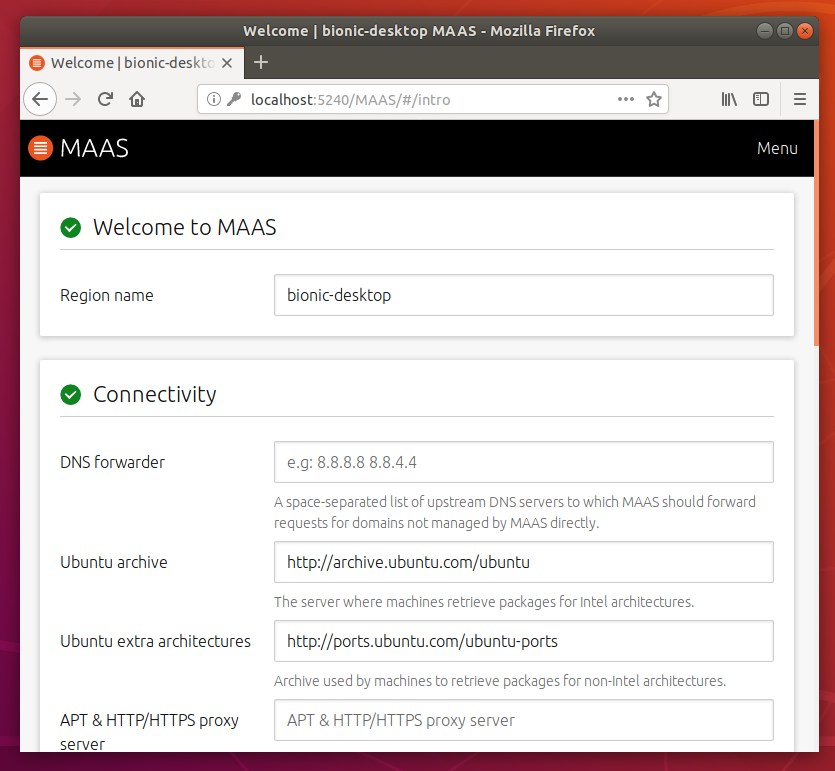
Welcome sets global values... |
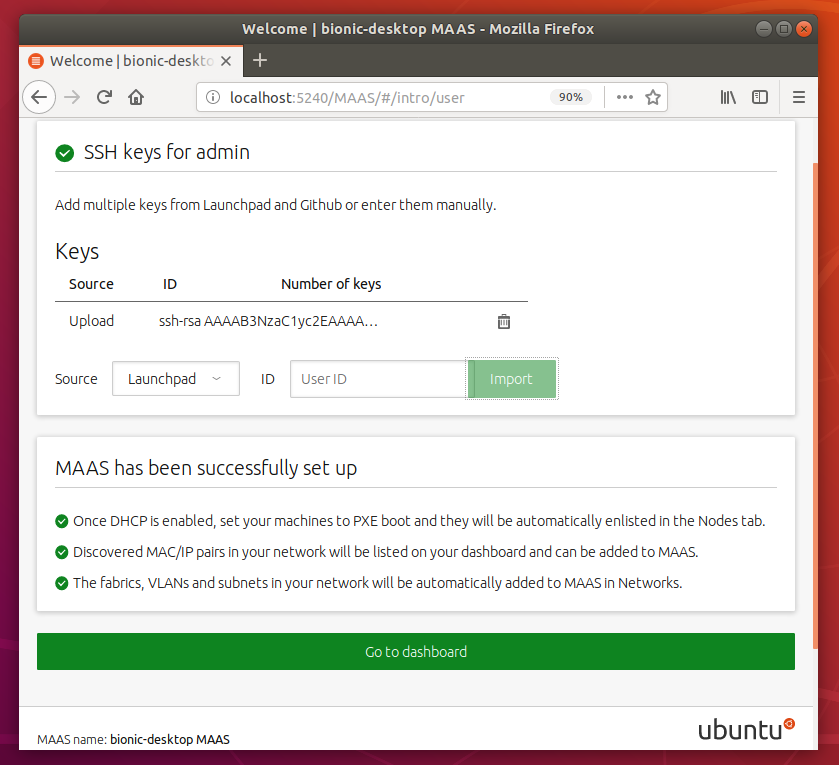
...before the MAAS Dashboard |
With this complete, you'll see MAAS has been successfully set up. Click 'Go to the Dashboard' to proceed (although you may need to wait a few moments for your selected images to sync locally).
Networking
The Dashboard landing page, manually opened with a click of the MAAS logo, lists non-registered devices detected automatically on the network. This network discovery enables you to easily add or map devices already connected to your network that you may not necessarily want managed by MAAS.
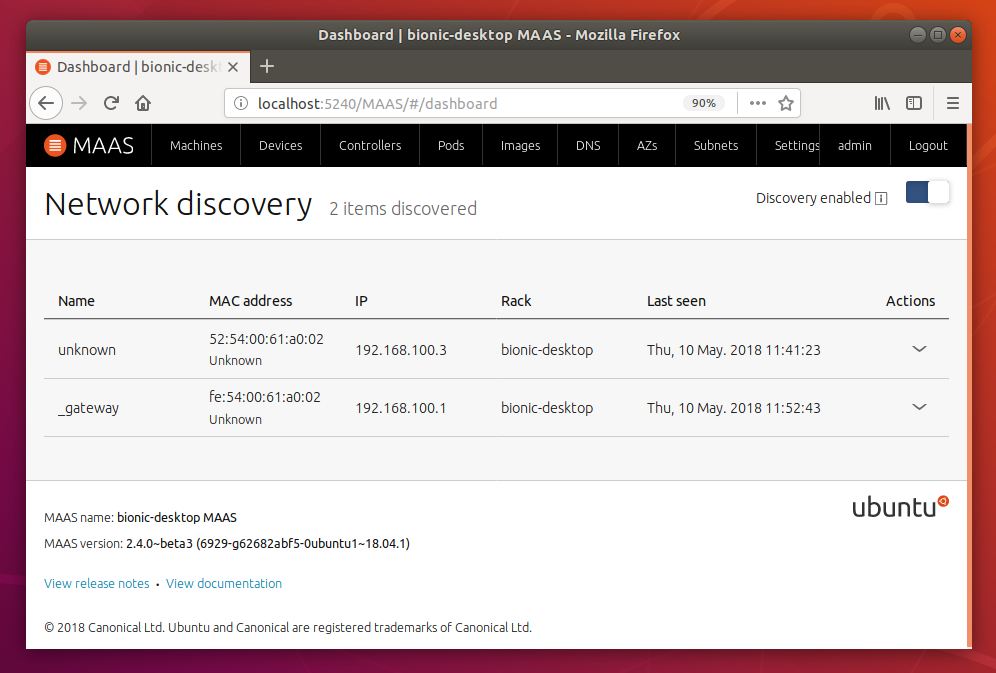
Note: Network discovery can be disabled at any time from the button on the Dashboard view.
Spaces, fabrics, zones and subnets
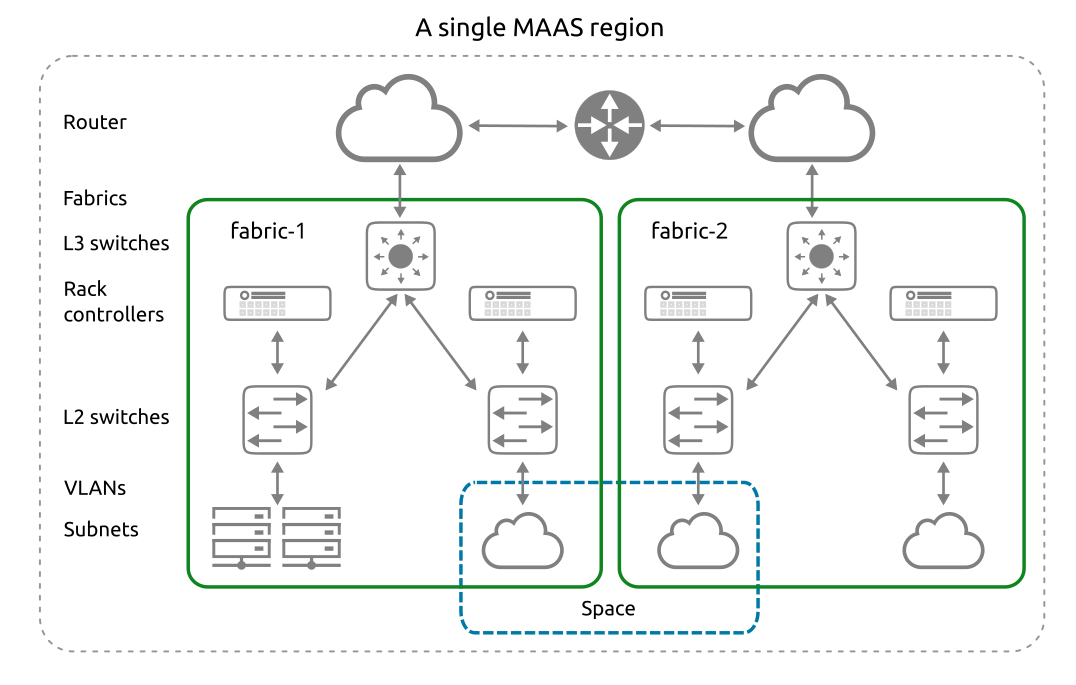
To accommodate rack installation within complex network topologies and the requirements of flexible machine deployment, MAAS offers comprehensive control over networking.
Alongside the management of its own domain, configured via the DNS page of the web UI, MAAS can isolate machine deployment across spaces, zones, fabrics and subnets.
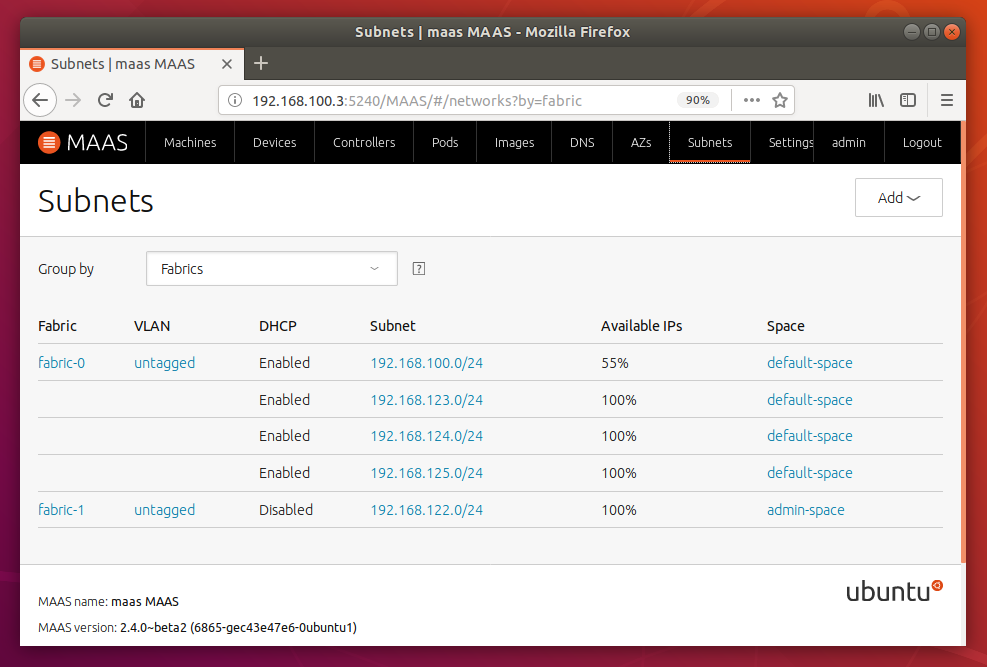
Network settings are spread across several web UI configuration pages. The Zones page, for example, enables you to see how many machines, devices and controllers are using a zone as well as making it easy to add a zone. The Subnets page provides access to fabric, VLAN, subnet and spaces configuration.
Deploy hardware
MAAS-managed machines are listed, and operated on, from the Nodes page, making this page one of the most important in the MAAS web UI.
If you're testing MAAS using virtual machines, creating a new instance and booting it on the same network will be enough for it to appear here. This is because new machines are added automatically when they first connect to your network. Alternatively, the 'Add hardware' menu lets you add machines via their MAC address manually.
After power and interfaces are configured, machines need to be commissioned to retrieve CPU, memory and storage information. From this point, they can be acquired, tested, deployed and released as fully fledged members of your MAAS cloud.
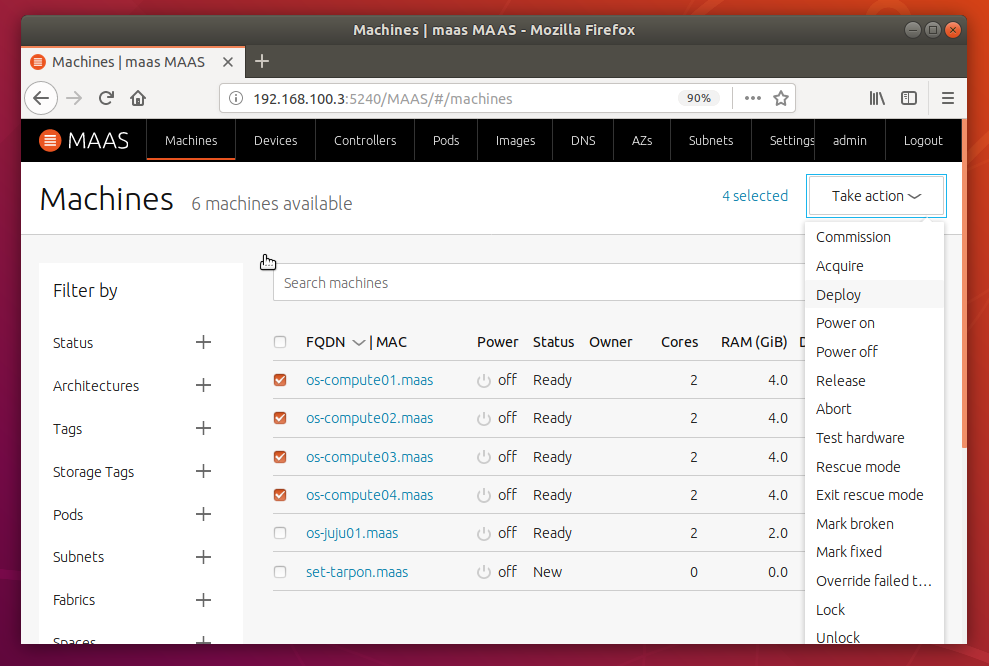
A powerful filtering mechanism on the left, based around tags and hardware characteristics, is used to list only those machines you're interested in, from where one or more can be selected and operated on.
Images
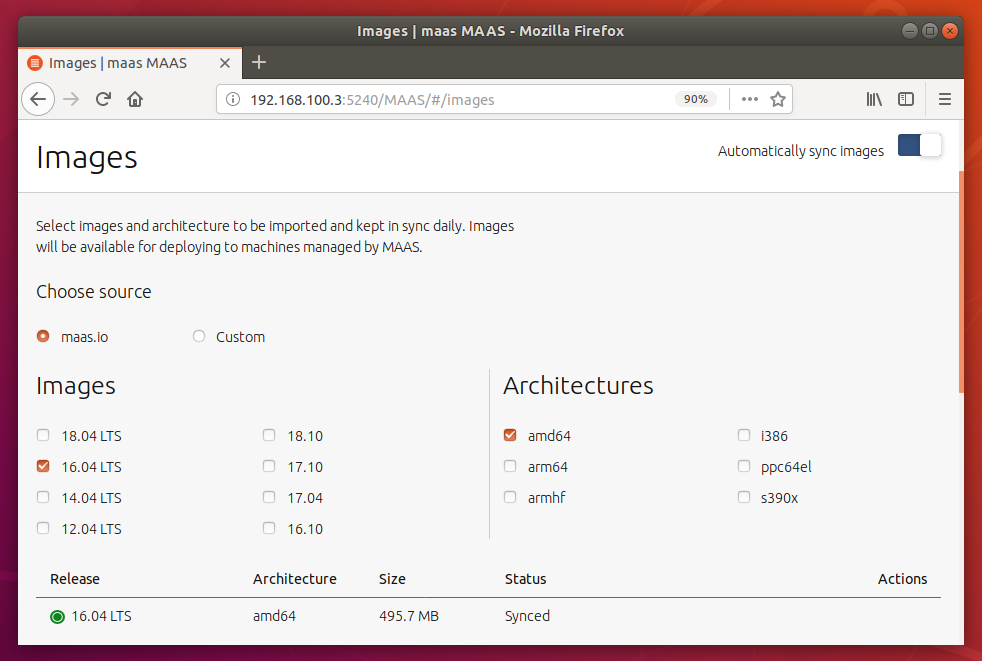
When it comes to running applications, MAAS can deploy any supported variant of Ubuntu, including LTS and non-LTS versions for x86, ARM, PPC and s390x systems. Both CentOS 7 and CentOS 6 can also be deployed to your machines, as can Windows, RHEL, and ESXi images with Ubuntu Advantage.
Pods
Even greater control over your hardware comes from the use of pods to group either virtual machines (using libvirt and KVM) or physical systems with Intel RSD into an abstraction of resources. This allows for composable hardware, where machine requests can be made without having a specific machine pre-built.
To add a pod of virtual machines, click the 'Add pod' button on the Pods page of the web UI, give the pod a name and select Virsh as the pod type, entering the address for the libvirt controlled pool below.
See Pods for further details on on adding libvirt virtual machines to MAAS.
After a pod has been created, hardware can be composed by selecting the pod and selecting 'Compose' from the action menu. From the pane that appears, you can select exactly how you'd like your composed hardware to be configured, including the number of cores, CPU speed, RAM and combined storage. Click 'Compose machine' and MAAS will combine resources to create a new single entity that can be used just like any other machine.
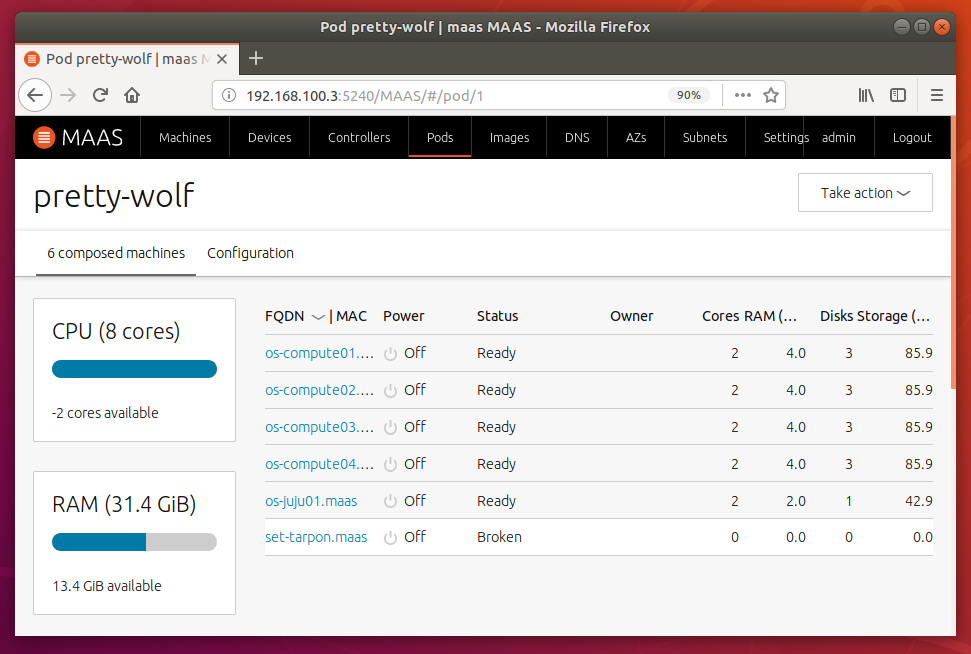
Pods abstract multiple resources... |
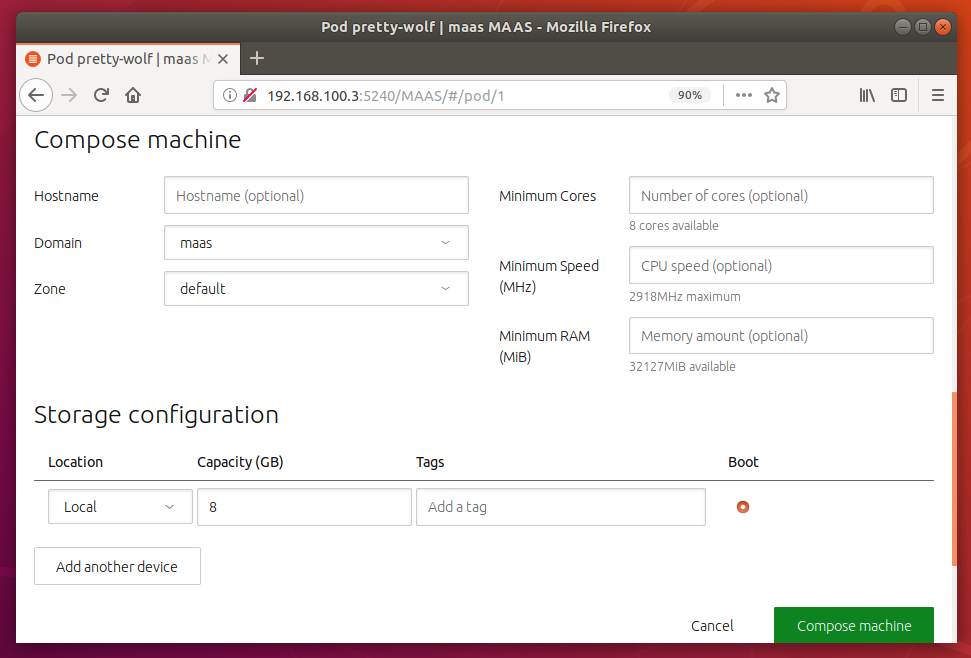
...into pools of composable hardware |
