Compose a VM
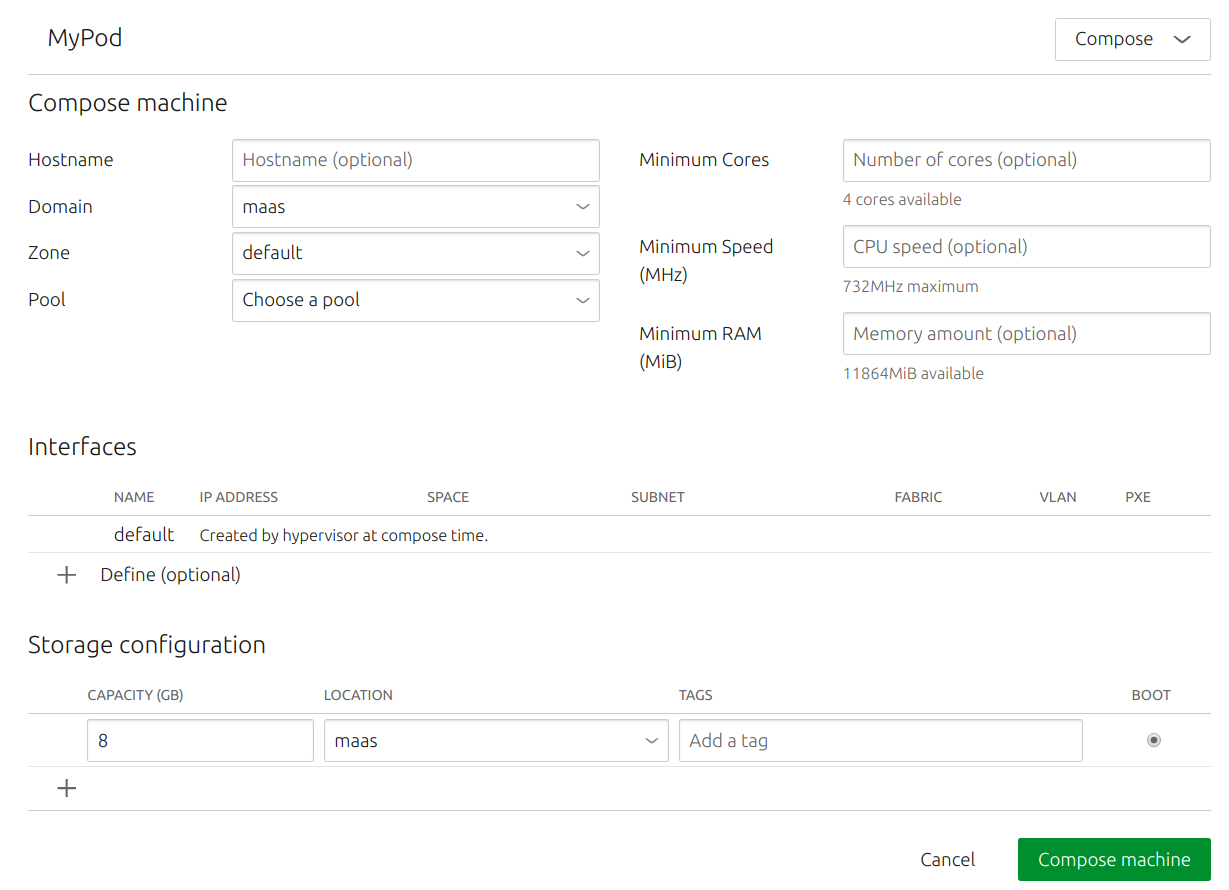
While on KVM host's details view, select 'Compose' from the 'Take action' drop-down menu to compose a machine.

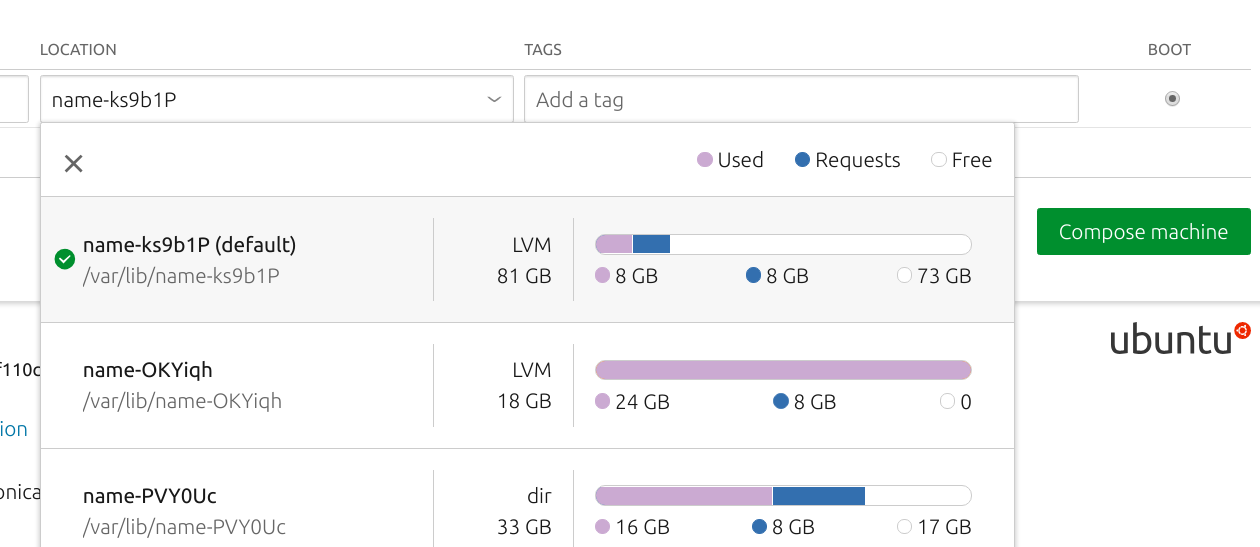
You can choose which storage pool to use from a drop-down list:

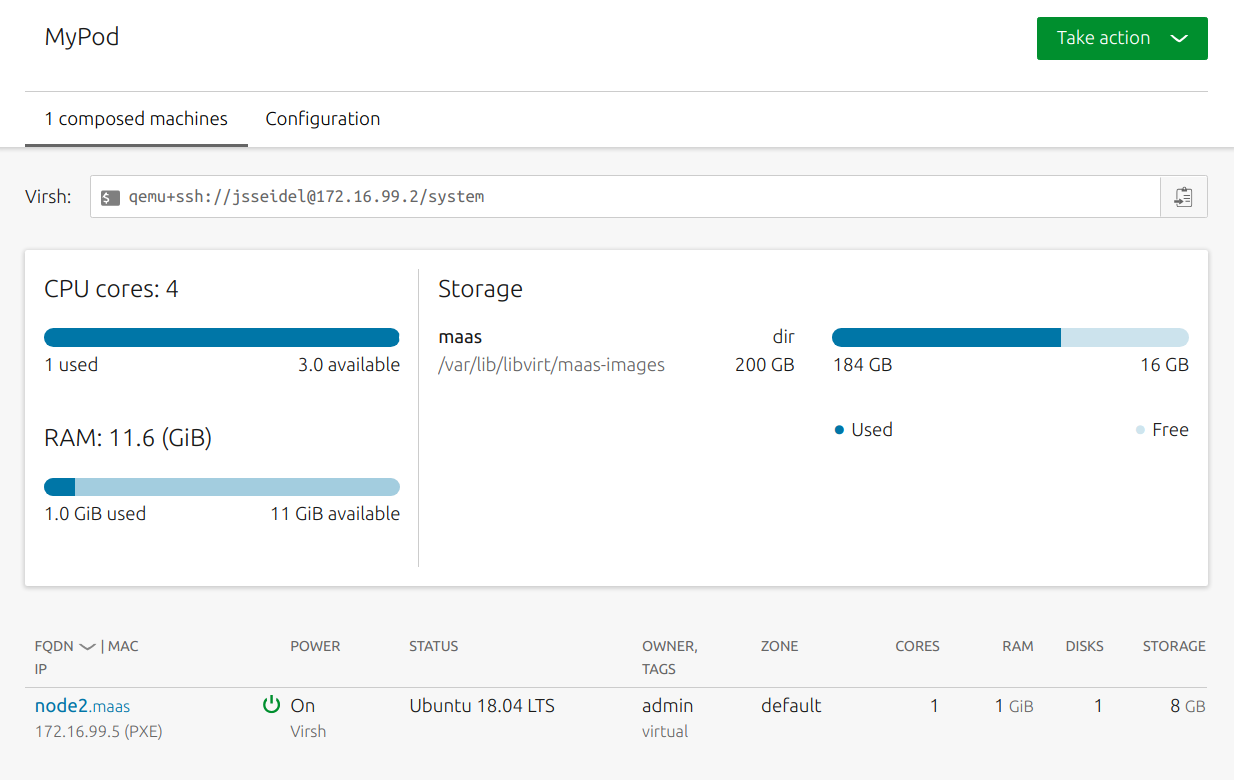
Click the 'Compose machine' button when you're finished. MAAS will present the pod detail view. In a few moments, your new machine will be auto-commissioned. The 'Machines' page will reflect this as well.
The new machine's resources will be deducted from the pod's resources:

CLI
Basic
To compose a basic pod VM:
maas $PROFILE pod compose $POD_ID
Example output for default composing:
{
    "system_id": "73yxmc",
    "resource_uri": "/MAAS/api/2.0/machines/73yxmc/"
}
Set resources
Compose with resources specified:
maas $PROFILE pod compose $POD_ID $RESOURCES
Where RESOURCES is a space-separated list from:
cores=requested cores
cpu_speed=requested minimum cpu speed in MHz
memory=requested memory in MB
architecture= See Architecture below
storage= See Storage below
interfaces= See Interfaces below
Architecture
To list available architectures:
maas $PROFILE boot-resources read
Then, for example:
maas $PROFILE pod compose $POD_ID \
    cores=40 cpu_speed=2000 memory=7812 architecture="amd64/generic"
Storage
Storage parameters look like this:
storage="<label>:<size in GB>(<storage pool name>),<label>:<size in GB>(<storage pool name>)"
For example, to compose a machine with the following disks:
- 32 GB disk from storage pool
pool1 - 64 GB disk from storage pool
pool2
Where we want the first to be used as a bootable root partition / and the
second to be used as a home directory.
First, create the VM:
maas $PROFILE pod compose $POD_ID "storage=mylabel:32(pool1),mylabel:64(pool2)"
Note that the labels, here mylabel, are an ephemeral convenience that you
might find useful in scripting MAAS actions.
MAAS will create a pod VM with 2 disks, /dev/vda (32 GB) and /dev/vdb (64
GB). After MAAS enlists, commissions and acquires the machine, you can edit the
disks before deploying to suit your needs. For example, we'll set a boot, root
and home partition.
We'll start by deleting the / partition MAAS created because we want a separate
/boot partition to demonstrate how this might be done.
maas admin partition delete $POD_ID $DISK1_ID $PARTITION_ID
Note: To find $DISK1_ID and $PARTITION_ID, use maas admin machine read $POD_ID.
Now, create a boot partition (~512MB):
maas admin partitions create $POD_ID $DISK1_ID size=512000000 bootable=True
We'll use the remaining space for the root partition, so create another without specifying size:
maas admin partitions create $POD_ID $DISK1_ID
Finally, create a partition to use as the home directory. Here we'll use the entire space:
maas admin partitions create $POD_ID $DISK2_ID
Note: To find $DISK2_ID, use maas admin machine read $POD_ID.
Now, format the partitions. This requires three commands:
maas admin partition format $POD_ID $DISK1_ID $BOOT_PARTITION_ID fstype=ext2
maas admin partition format $POD_ID $DISK1_ID $ROOT_PARTITION_ID fstype=ext4
maas admin partition format $POD_ID $DISK2_ID $HOME_PARTITION_ID fstype=ext4
Note: To find the partition IDs, use maas admin partitions read $POD_ID $DISK1_ID and maas admin partitions read $POD_ID $DISK2_ID
Before you can deploy the machine with our partition layout, you need to mount the new partitions. Here, we'll do that in three commands:
maas admin partition mount $SYSTEM_ID $DISK1_ID $BOOT_PARTITION_ID "mount_point=/boot"
maas admin partition mount $SYSTEM_ID $DISK1_ID $ROOT_PARTITION_ID "mount_point=/"
maas admin partition mount $SYSTEM_ID $DISK2_ID $HOME_PARTITION_ID "mount_point=/home"
Finally, we deploy the machine. MAAS will use the partitions as we have defined them, similar to a normal Ubuntu desktop install:
maas admin machine deploy $SYSTEM_ID
Interfaces
Using the interfaces constraint, you can compose virtual machines with
interfaces, allowing the selection of pod NICs.
If you don't specify an interfaces constraint, MAAS maintains backward
compatibility by checking for a maas network, then a default network to
which to connect the virtual machine.
If you specify an interfaces constraint, MAAS creates a bridge or macvlan
attachment to the networks that match the given constraint. MAAS prefers bridge
interface attachments when possible, since this typically results in successful
communication.
Consider the following interfaces constraint:
interfaces=eth0:space=maas,eth1:space=storage
Assuming the pod is deployed on a machine or controller with access to the
maas and storage spaces, MAAS will create an eth0 interface
bound to the maas space and an eth1 interface bound to the storage space.
Another example tells MAAS to assign unallocated IP addresses:
interfaces=eth0:ip=172.16.99.42
MAAS automatically converts the ip constraint to a VLAN constraint (for the
VLAN where its subnet can be found -- e.g. 172.16.99.0/24.) and assigns the IP
address to the newly-composed machine upon allocation.
See the Machines MAAS API documentation (op=allocate) for a list of all
constraint keys.
Find pod IDs
Here's a simple way to find a pod's ID by name using jq:
maas $PROFILE pods read | jq '.[] | select (.name=="MyPod") | .name, .id'
Note: jq is a command-line JSON processor.
Example output:
"MyPod"
1
Delete a machine
To delete a machine, simply delete it as you would any other MAAS node. Select the desired machine from the list of machines and select 'Delete' from the 'Take Action' menu.

CLI
Delete a VM
maas $PROFILE machine delete $SYSTEM_ID
After a machine is deleted, the machine's resources will be available for other VMs.
